
Linked accounts let you run several completely separate workspaces — for example one for each of your businesses, plus one for personal expenses — all under a single SparkReceipt login. Each linked account has its own documents, users and settings, so the books for one company never mix with another.
How to create a linked account
- Log in to SparkReceipt on the web app or mobile app.
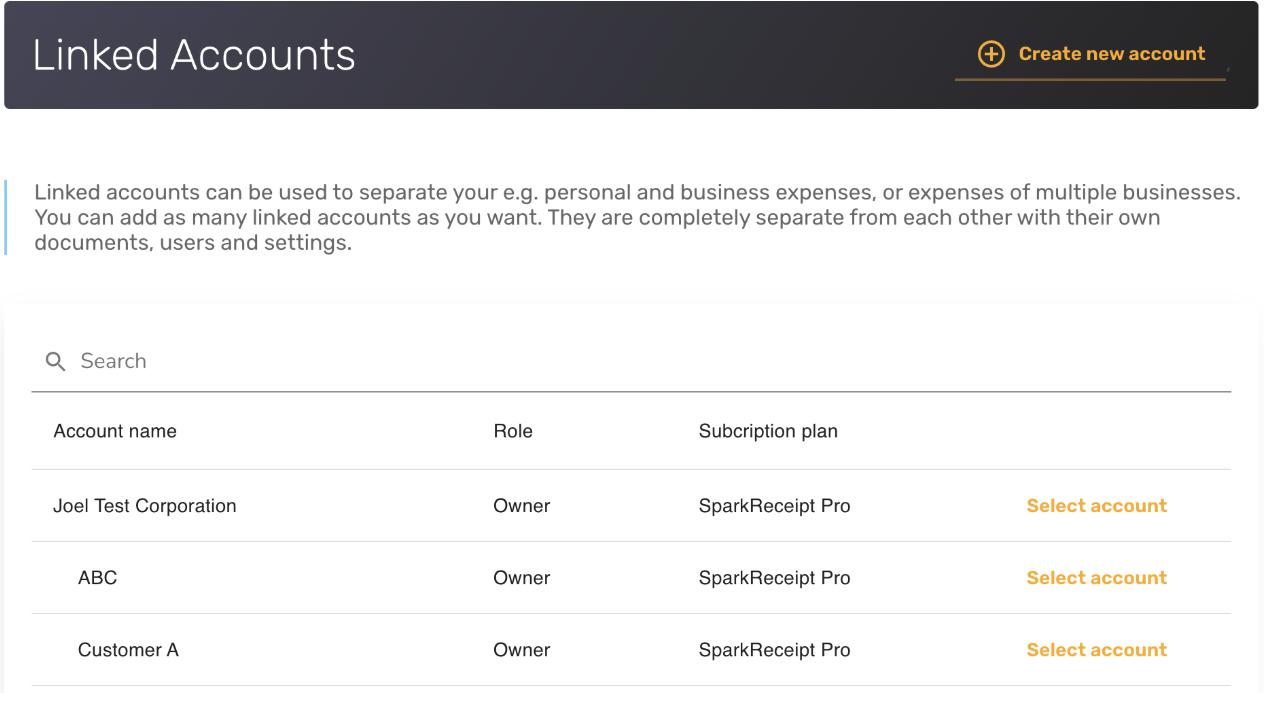
- Open your account settings and go to Linked accounts (you'll also find Linked Accounts in the user menu in the top corner).
- Click + Create new account in the top right.
- Give the new account a name and confirm.
Only the account owner or an admin can create a linked account. Your very first account is created for free; creating additional linked accounts requires an active paid subscription on your main account.
Root account and sub-accounts: how they fit together
The first account you create is your root (main) account. Every additional workspace you create is a sub-account linked to it. Together they form your "linked account space" — a group of accounts that all belong to you as the owner.
This matters for two things in particular: seats are shared across the whole group, and users are scoped to one account at a time. Both are explained below.
Seats are shared across all your linked accounts
Your seat allowance is pooled across your root account and all of its sub-accounts — it is not a separate limit per account. SparkReceipt adds up the seats from each account in the group (your owner seat is only counted once, not once per account) to give you one shared pool.
A few consequences worth knowing:
- The "seats used" figure shown in Account & Users reflects usage across all of your linked accounts, not just the one you're currently viewing.
- The same person counts as one seat even if they belong to several of your linked accounts — SparkReceipt recognises them as the same user and won't charge you twice.
- Adding a brand-new person to any one account uses one seat from the shared pool.
For the full mechanics of buying and counting seats, see Inviting new users / adding new seats.
Each user belongs to one account at a time
When you invite someone to a specific linked account, they become a member of only that account. Adding a user to your root account does not automatically give them access to your sub-accounts, and vice versa — access is granted per account.
To give one person access to several of your linked accounts, use the Link existing user feature in Account & Users rather than sending them a separate invitation email for each account. Linking reuses their existing login, so they don't end up with duplicate accounts, and because they're recognised as the same user they don't consume an extra seat in your shared pool. (A separate invitation, by contrast, can create a second login that would count as another seat.)
Documents stay private to each account
Linked accounts are completely separated: documents in one account are not visible from another. If you upload a receipt into the wrong account, you don't have to delete it — select the document, use Assign → Move to Account, and pick the correct linked account. See How to move documents between linked accounts for the full steps.
Switching between accounts
To jump from one linked account to another, open the user menu in the top corner and choose Switch Account. The account you switch to becomes your current account, and everything you do — uploading documents, inviting users, changing settings — applies to that account until you switch again.
How to rename a linked account
Renaming always applies to the account you're currently in, so first switch into the account you want to rename (see Switching between accounts above). Once it's your current account:
On the web app
- Go to Account settings then Account and Users.
- Find the Account name field and click Edit.
- Change the Account name field and click Save.
On the mobile app
- Open Account settings → Account information.
- Tap the edit (pencil) icon next to Account name.
- Type the new name and tap the checkmark to confirm.
Only the account owner or an admin can rename an account.
Note: changing an account's name also changes the inbound email addresses used to forward documents into that account by email. SparkReceipt keeps your previous inbound addresses working for a while — up to five addresses in total — so nothing gets lost during the switch, but start using the new address as soon as you can.